MATERIAL MASTER CUSTOMIZATION
In the previous article, we saw how to create material in SAP S/4 HANA – SAP MM. Now, this article will be all about Customizing the Material Master data. We will customize the Industry type, Material type, data screens for each screen sequence, etc.
So let us dive deeper into the topic.
Customize the Material type
Step 1
Path -> SPRO -> Logistics General -> Material Master -> Basic Settings -> Material Type -> Define attributes of material type
You can also use T.code -> OMS2


Go to Position – enter standard – ROH. The standard will appear on the top. You now have to select the standard and copy it as to create your material type.


You will get this screen where you will have to edit a few entries.

Here, you can customise the material type according to your organization’s needs. User descriptions here are the Views which we used in the material creation. You can select as many views as you want for your customized material type. External no. assignment w/o check should be ticked. This will enable you to create material manually using alpha numeric code. In the end, save the data.

Your material type will be created. These changes will be now seen in the MM01 T.code under Material type.

Step 2
Go to OMS2
Select your material type and click on Quantity/ Value updating under Dailog structure on the left side as shown in the figure below.

Go to Position – Enter your Valuation area and green tick.

Your Material type along with the valuation area (plant) will appear on the top. Here you have to tick under Quantity updating and Value updating. Save the data.

Customize the Industry Type
Step 1
Go to T.code -> OMS3 or
Path -> SPRO -> Logistics General -> Material Master -> Field selection -> Define industry sectors and Industry sector-specific field selection.
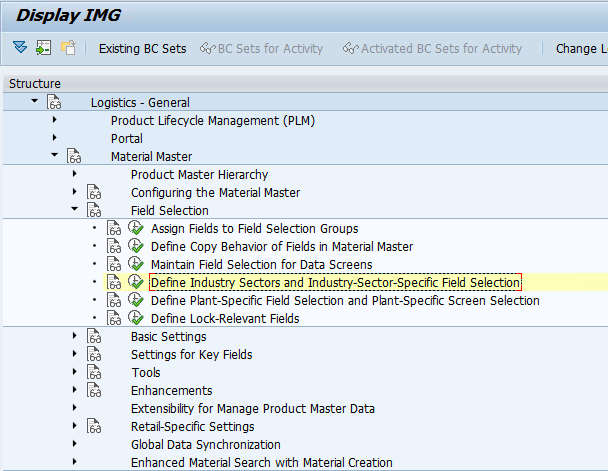
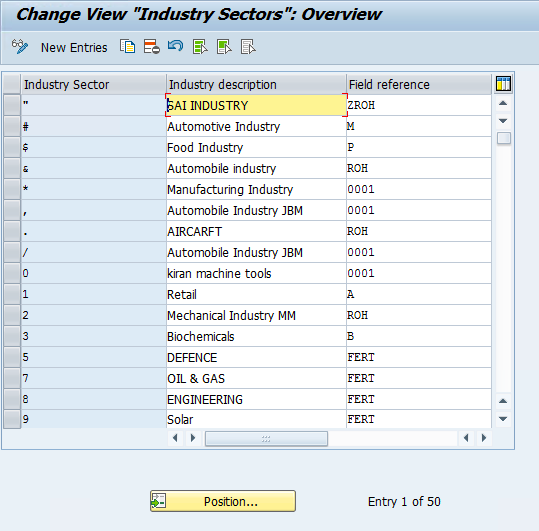
New entries and add your industry type.
Note – Industry Sector uses only a single alphabet. (I am using a demo server). Industry description can be anything.
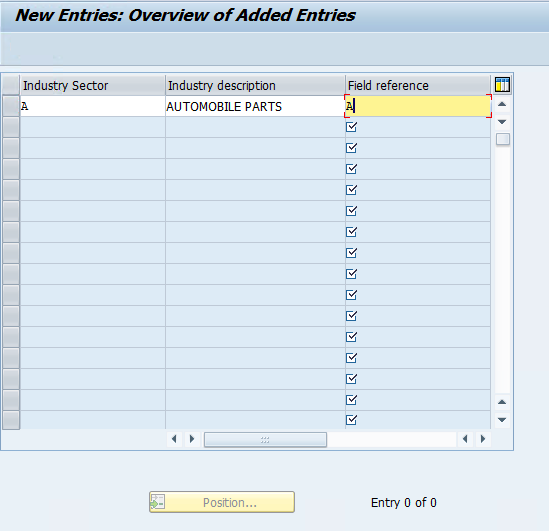
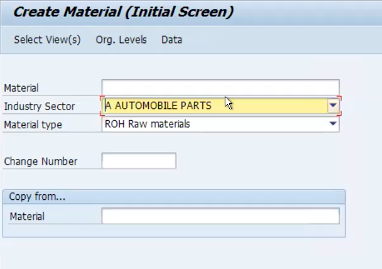
Save the data. Go to MM01 – You can now input the customized industry type.
Customize Data Screens
Step 1
Go to Path -> SPRO -> Logistics General -> Material Master -> Configuring the Material Master -> Define structure for Data sequence for each Screen sequence.
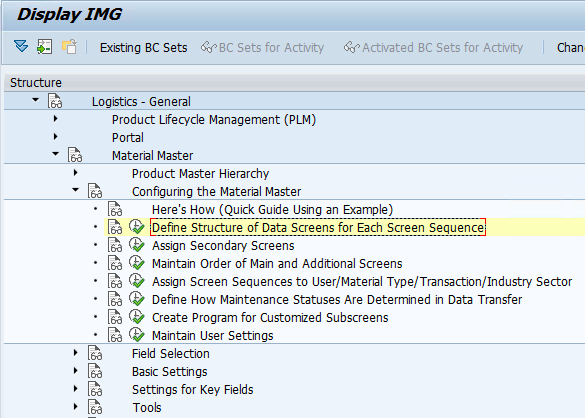
Select 21 – Std ind.(short) tab pages. This is the standard. Copy as – Edit – Instead of 21 type ZT. Enter 2 times, the box will appear, press enter till everything is copied.
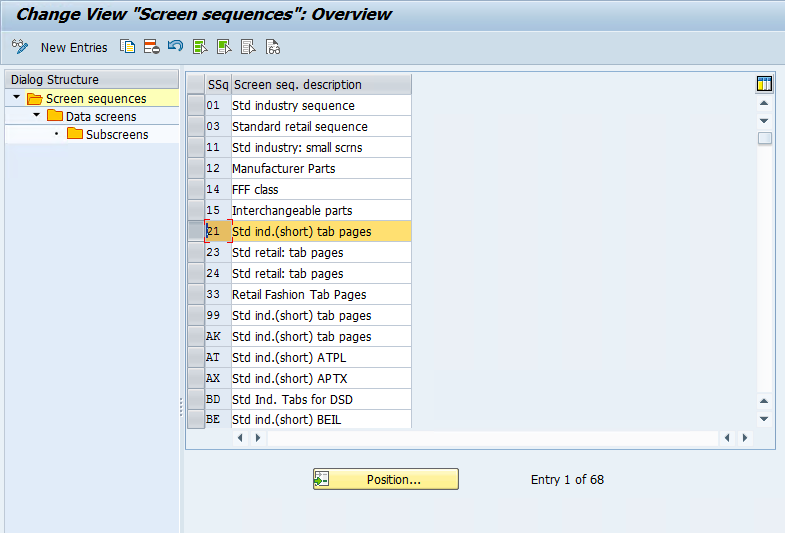
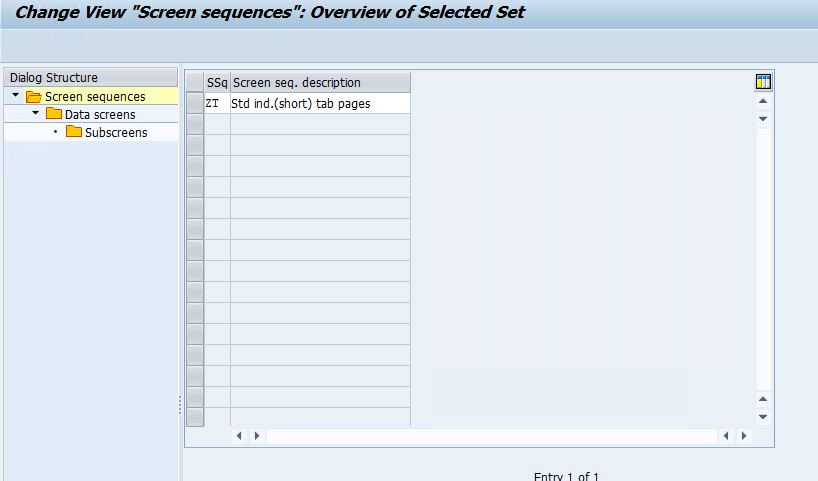
Step 2
To move the screens and sub screens of Material master up and down. ( The basic data 1, 2, purchasing, General data/ storage 1, 2, Accounting screens and sub screens)
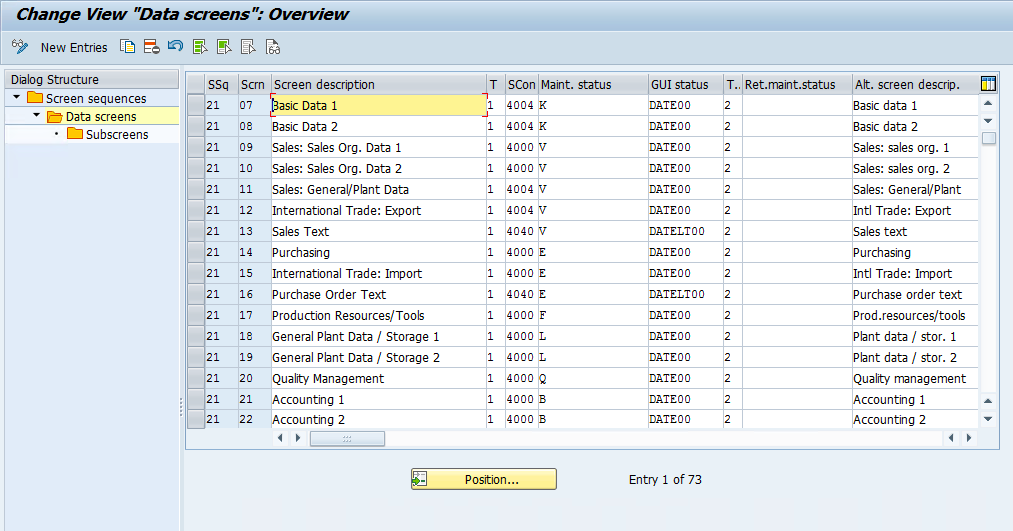
Double click on Data screen under Screen sequences on the left side. Select any one screen description shown in the above figure.
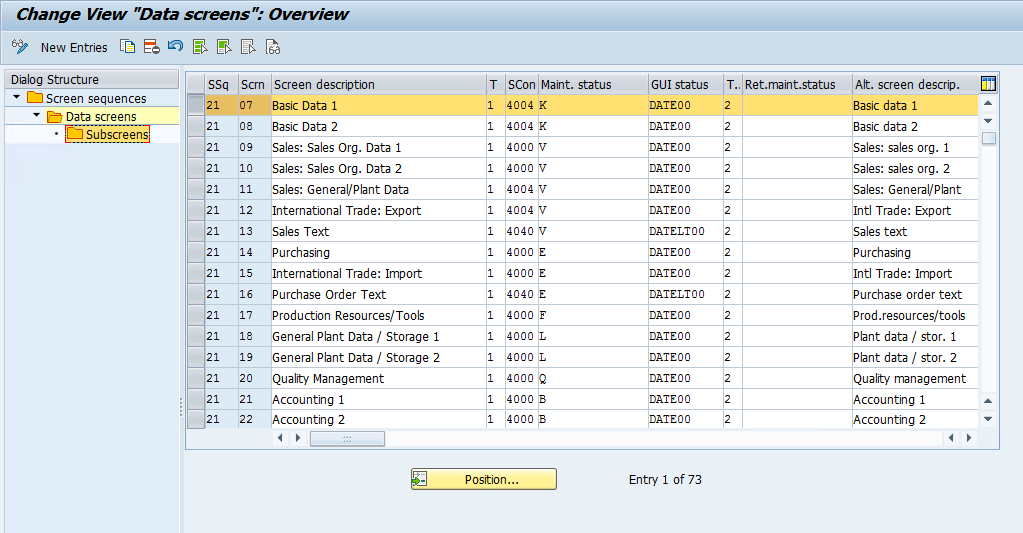
I have selected first option – Basic data 1 and then double click on subscreens option given on the left side.
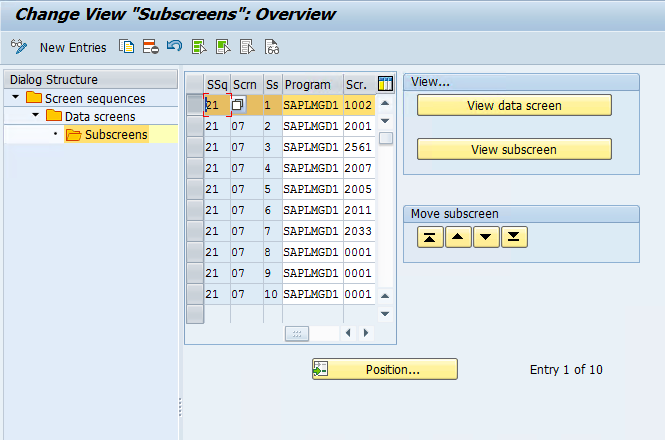
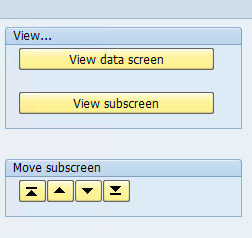
Select any SSq – Screen sequence and can edit by clicking on view data screen or view sub screen. To change the sequence you can move screen up and down as per your choice.
Save the data.
I hope this article was useful to you.

