
In this article, you will define the valuation classes allowed for a material type. If a user creates a material, he or she must enter the material’s valuation class in the accounting data.
Configuration of Valuation Class
let us follow the steps below to configure the valuation class for the material master in SAP MM.
Step 1: Define Valuation Control
Path -> SPRO -> Implementation Guide -> Material master -> Valuation and Account Assignment -> Account Determination -> Account determination without Wizard -> Define Valuation Control
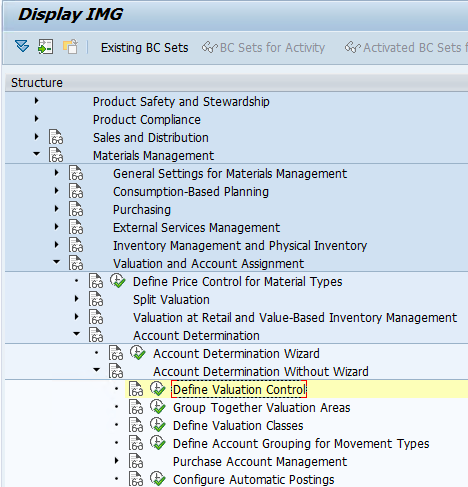
Here, you have to check whether the first option – Valuation grouping code active is set as the current setting or not.
Go back to the Implementation Guide.
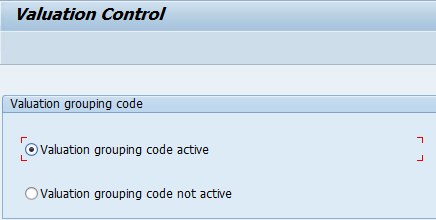
Step 2: Group together the Valuation Areas
Path -> SPRO -> Implementation Guide -> Material master -> Valuation and Account Assignment -> Account Determination -> Account determination without Wizard -> Group together Valuation Class
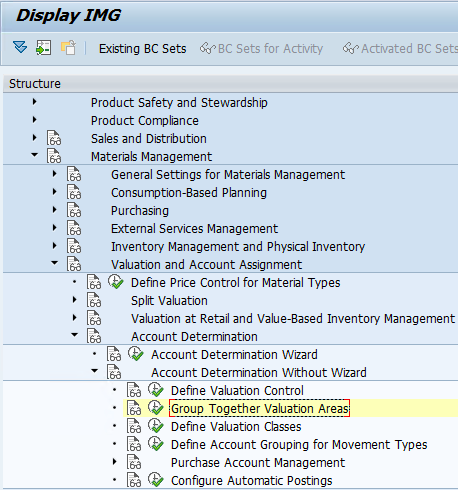
In position. – select your Valuation Area – T001
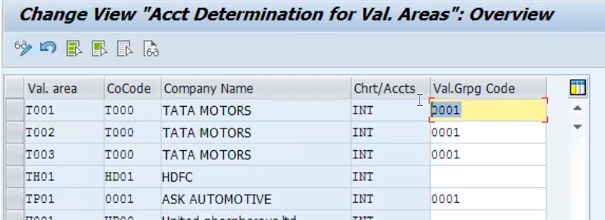
Change the Valuation Group Code to a new code of your choice.
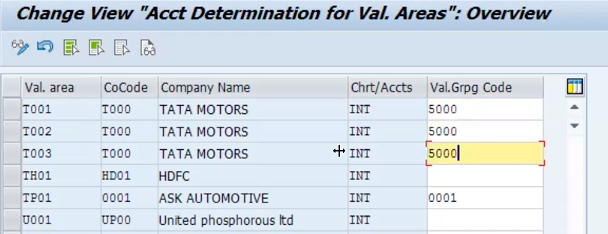
Save the data and Go back.
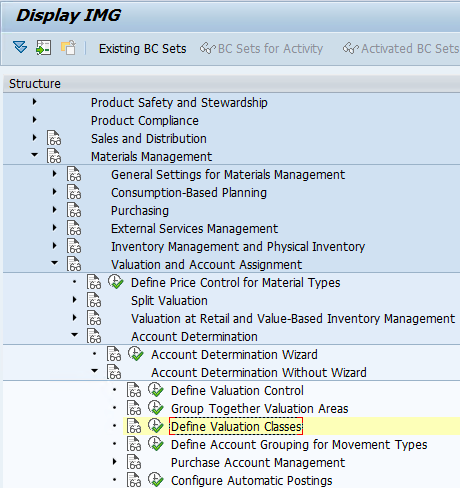
Step 3: Define Valuation Classes
Path -> SPRO -> Implementation Guide -> Material master -> Valuation and Account Assignment -> Account Determination -> Account determination without Wizard -> Define Valuation Classes
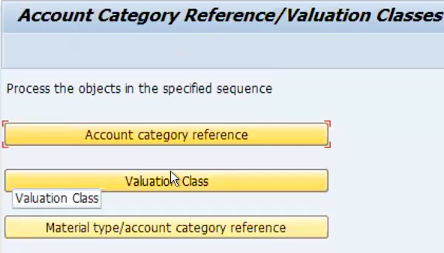
Click on Account Category Reference
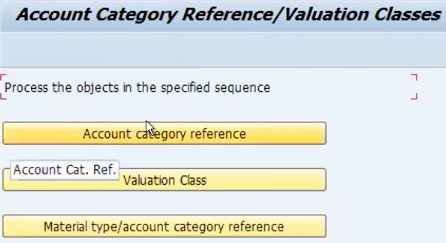
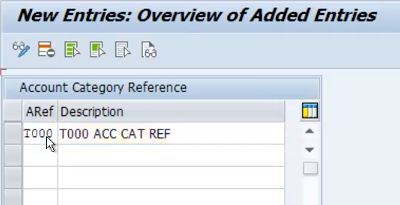
Click on new entries
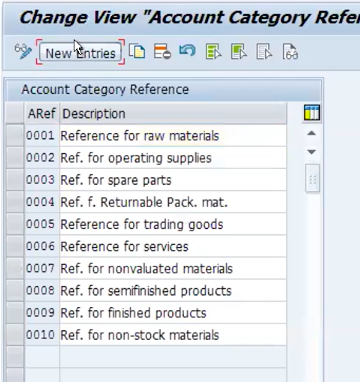
Add account reference and description of your choice and save the data.
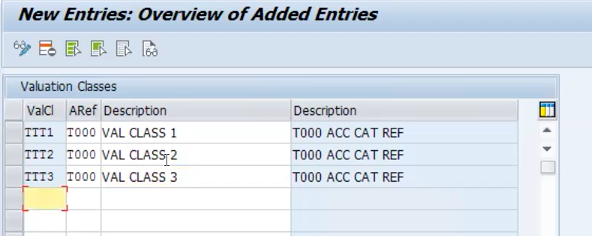
Go Back and Click on -> Valuation Class
Click on -> New entries.
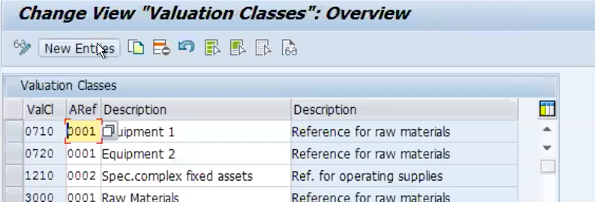
Add the valuation class, Account reference you created and description of both. This way you are linking the valuation class with the account reference. Save the data
Go back and click on -> Material type/ account category reference
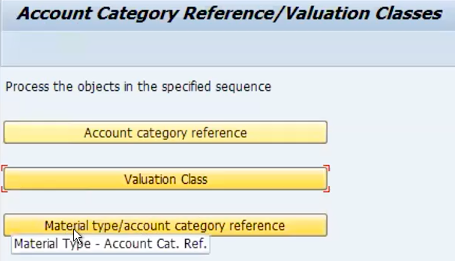
In position -> Search for your material type – TROH
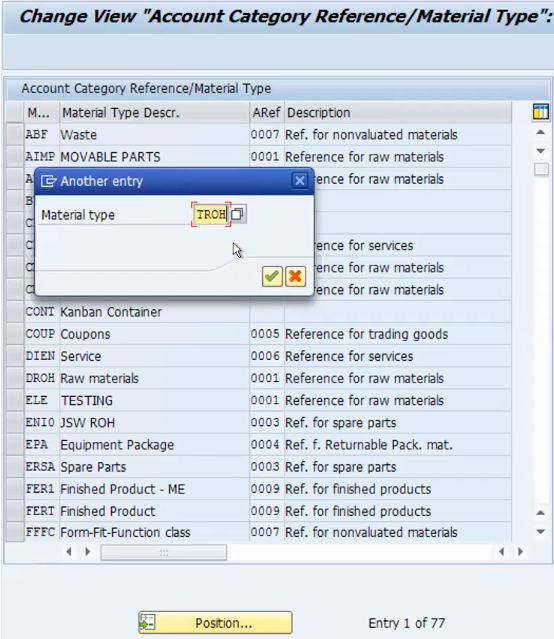
Link your material type to the account reference.
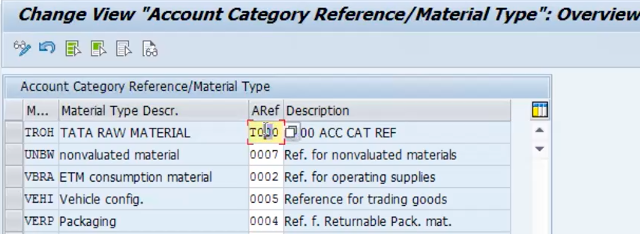
Save the data.
Configuration of valuation class is completed.