BUSINESS PARTNER
In the last article, we saw the configuration of Business Partners. After setup, we need to create the Business Partner.
Data in the vendor master record is organised under general data, company code data and purchasing organization data. It includes information like the Vendor’s name, address, reconciliation account, payment terms, and Schema group, among other things. The purchase data will be maintained at the appropriate purchasing organization level, and the vendor master will be prepared centrally. The display field in the purchasing organization data will include the order currency and payment terms. The purchase order can be modified if the master data currency differs from the purchasing currency.
Business partners are involved with your firm in various ways, referred to as partner functions. The rights and obligations of each sort of partner in a commercial transaction are specified using partner functions. Your company partners may take on partner roles, such as ordering address, products provider, and alternate payee, when you sell or order items, for instance.
Let us look at the step-wise process.
CREATE BUSINESS PARTNER
Step 1: Create for General Data
Path -> T.Code -> BP
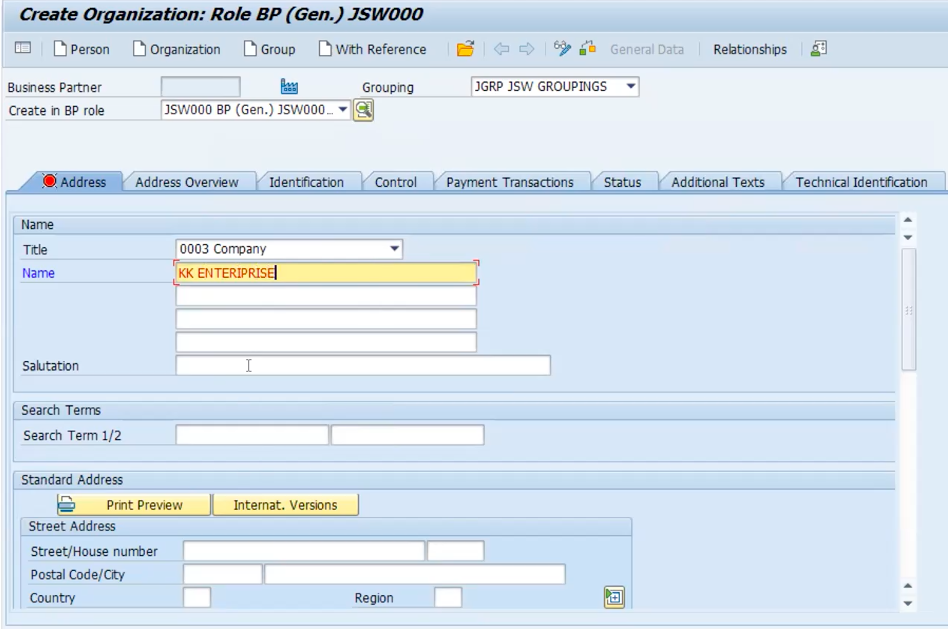
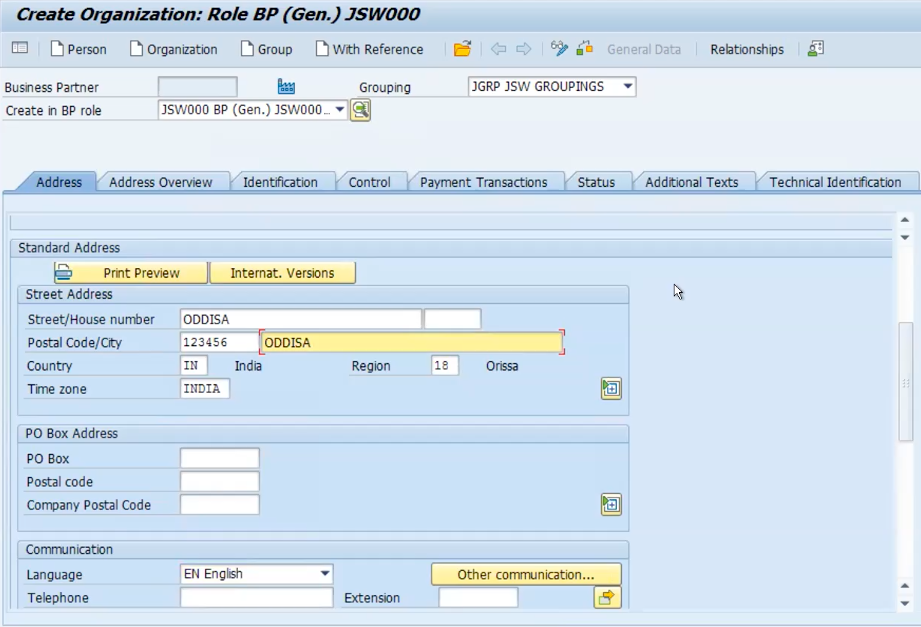
Enter the created BP Role for general and grouping as shown in the figure below. Add Title – 0003 Company (Standard), name, street address and language.
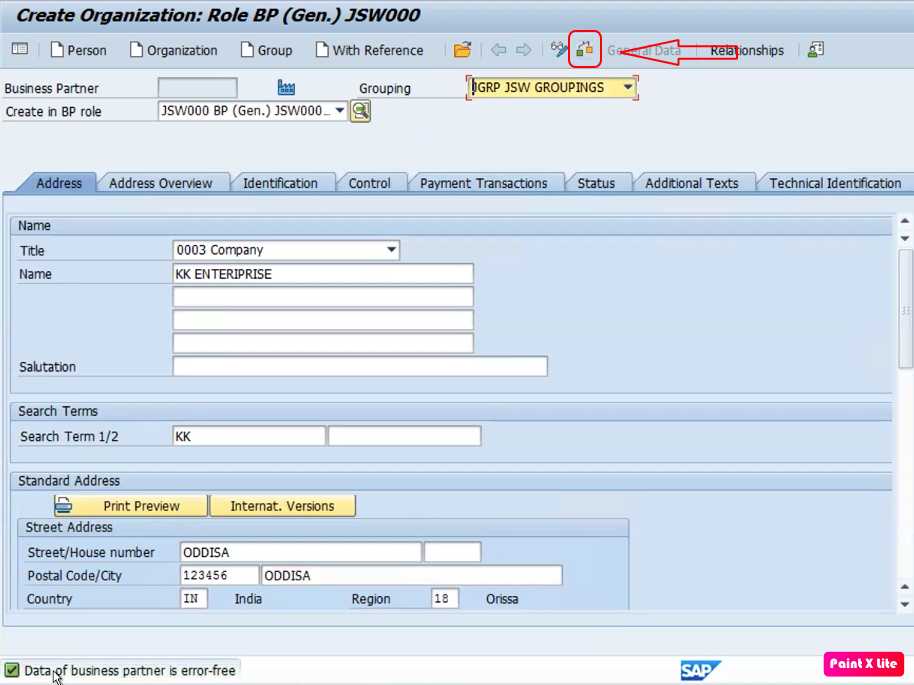
After updating the data, click on check-in box as marked in the figure below. You will get a message at the bottom – Data of business partner is error-free.
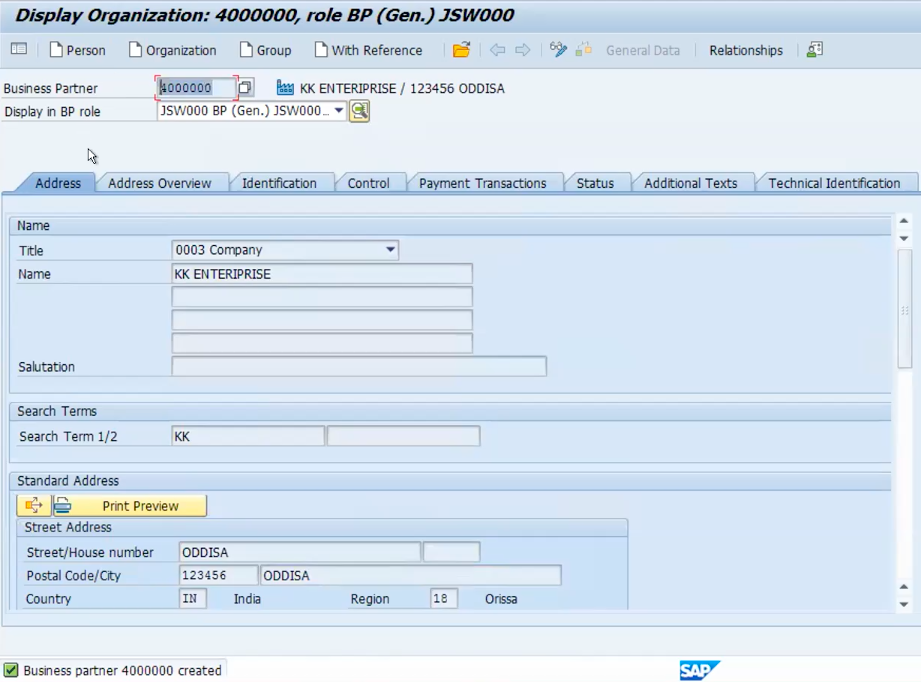
Save the data. The business partner is created for general data.
Step 2: Company Code
Now Change the BP Role – Supplier. The one we created previously in the article.
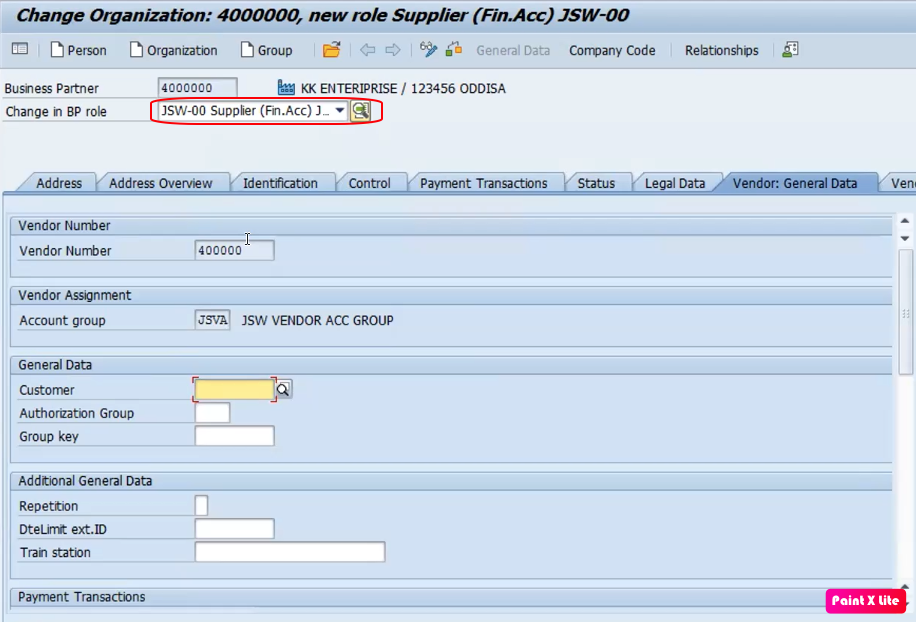
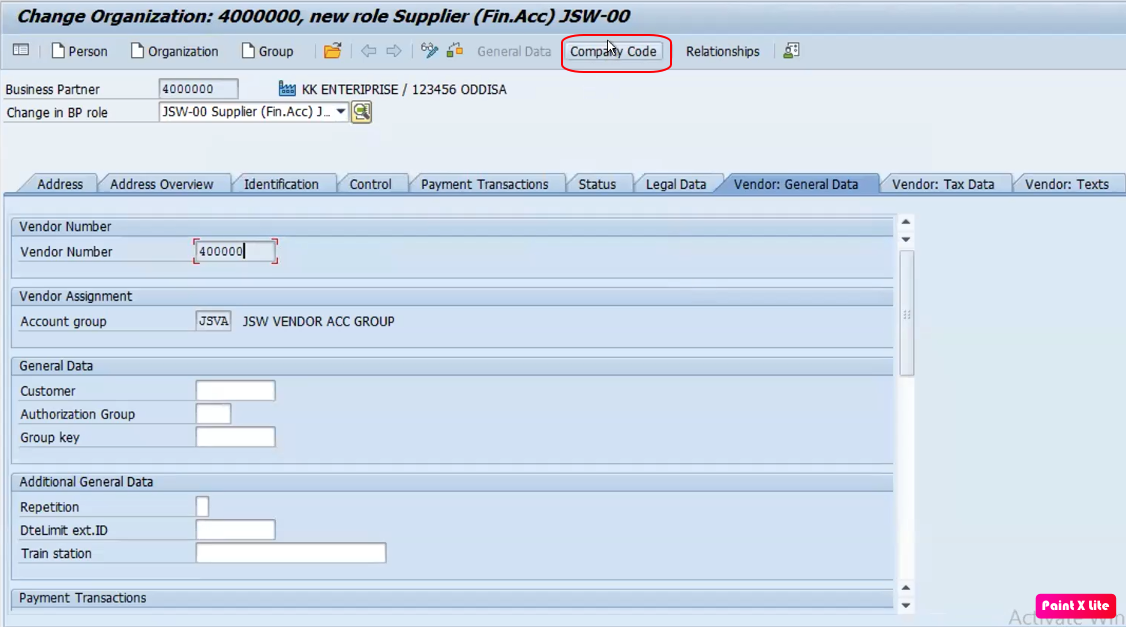
Once you enter the BP Role of Supplier – JSW-00, the vendor number is created automatically. Now click on the Company Code. You will see the company code 1710.
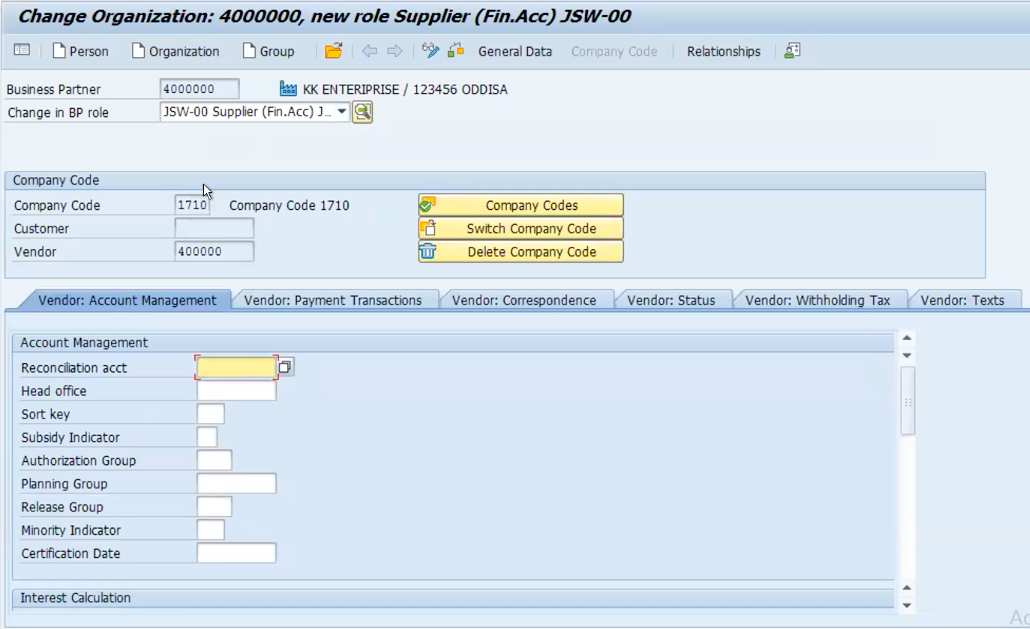
Delete this company code and enter your company code – T000. Press enter.
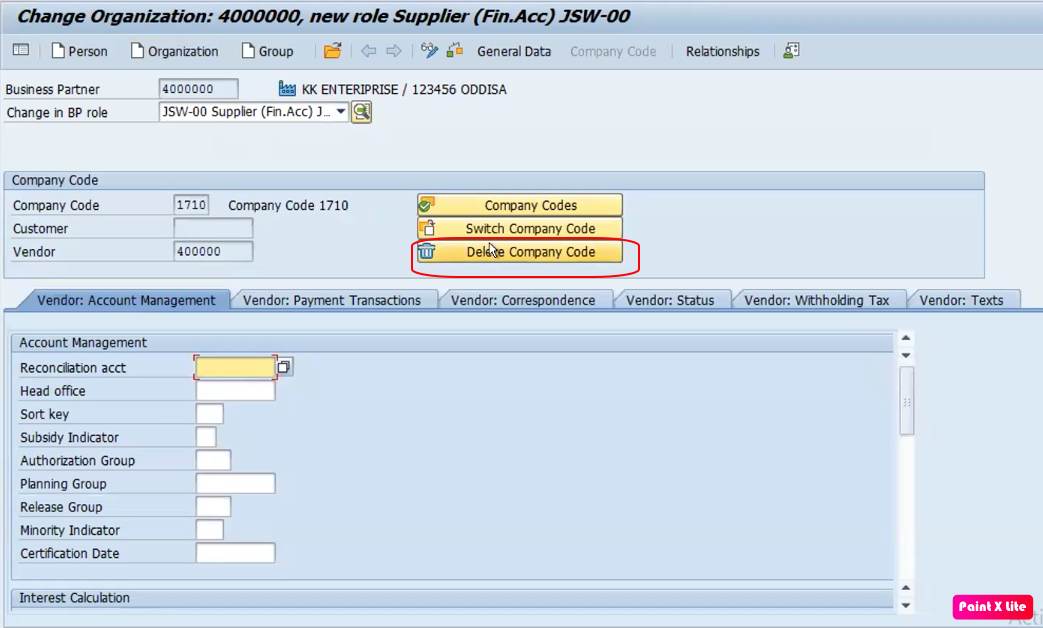
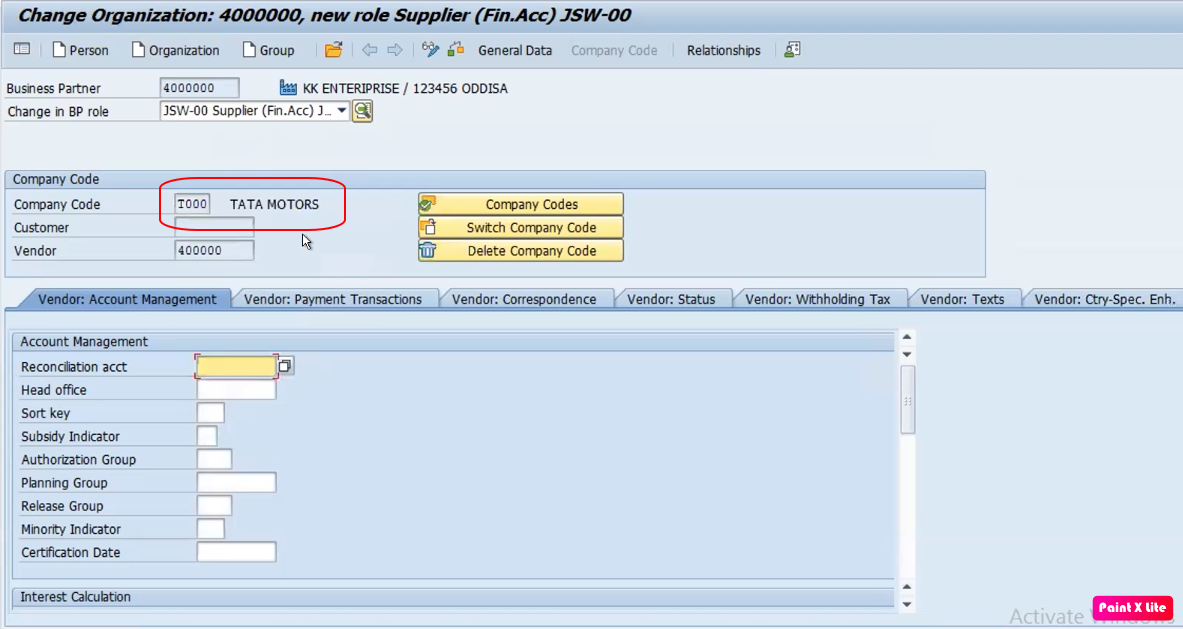
Add Reconciliation Account – 16000, and click on check-in. The data will be saved.
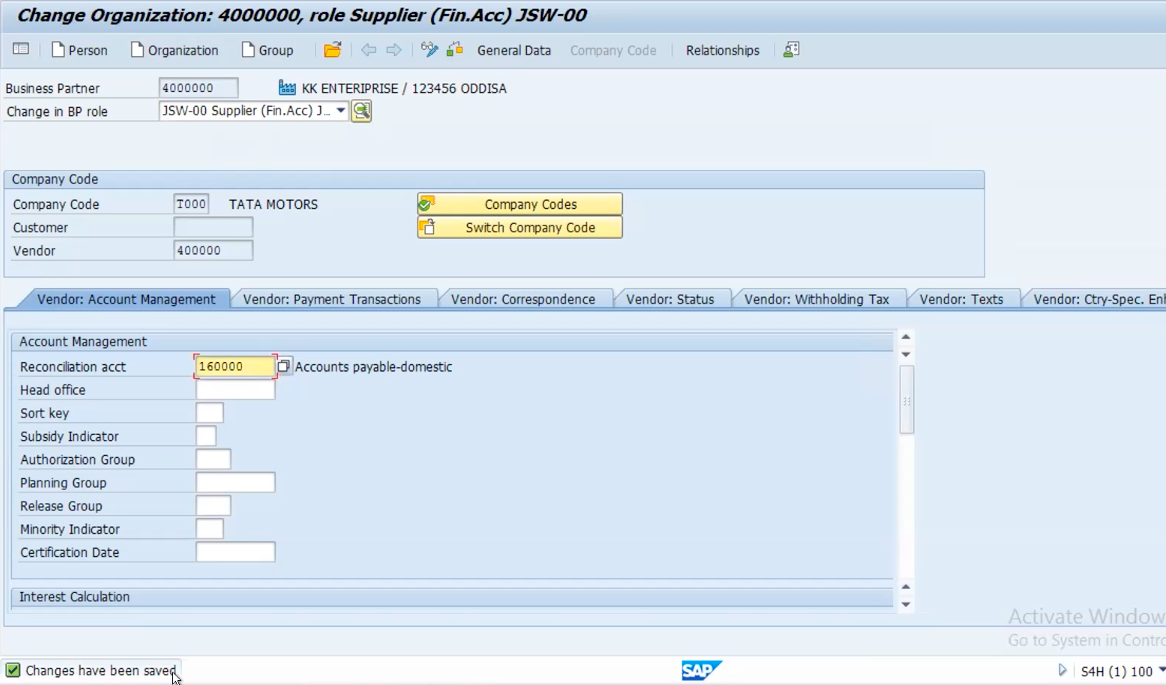
Step 3: Purchasing
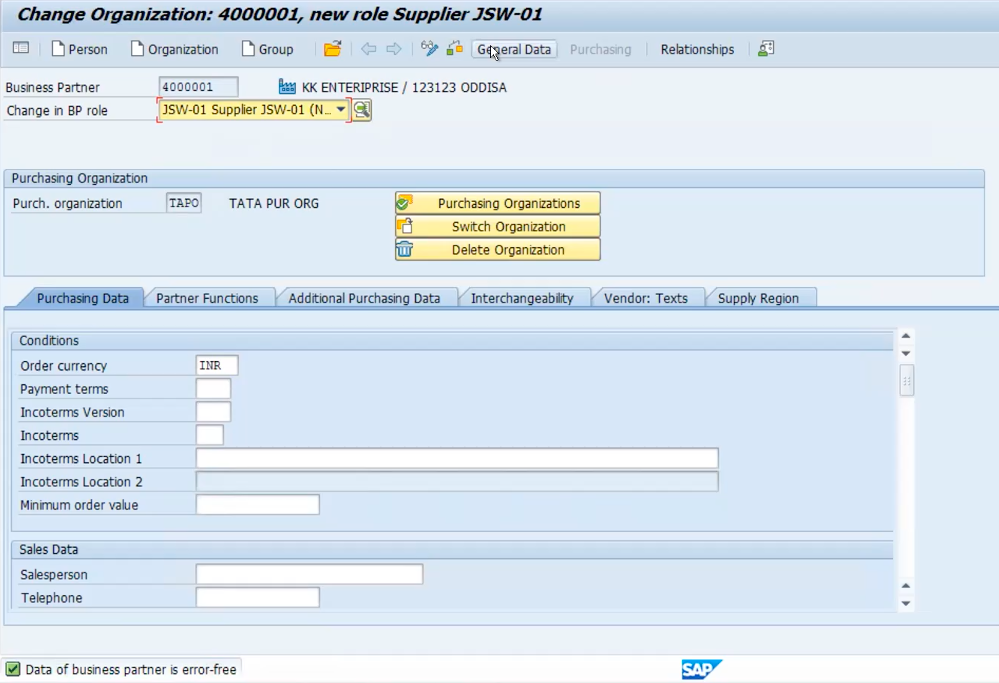
Select Change in BP Role as – JSW-01. and add your Purchasing organisation – TAPO. The data which we entered is all created. Select order currency as -INR. Check-in and save data.
Step 4: BP created data
We can see the BPs created by us by using T.code -> MKVZ
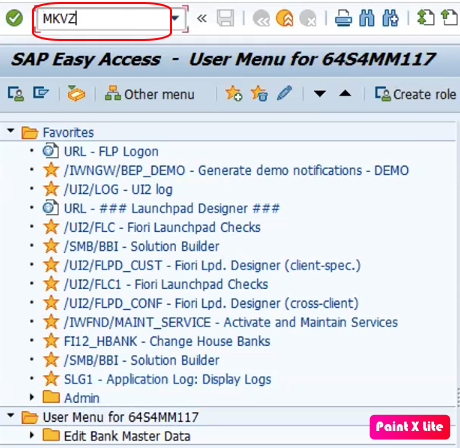
Enter your Purchasing Organisation and click on execute.


You can see the BP created by you here.
I hope this article was useful.
